DIY Window Tint Kits and Tools Guide for Beginners
DIY window tint kits let you transform your car’s windows with professional-grade results without spending a fortune. This complete guide covers everything from choosing the right window tint film to mastering the wet application method like a pro. You will learn about essential tinting tools, common mistakes to avoid, and how to maintain your tint for years of UV protection and glare reduction.
Have you ever looked at a car with beautifully tinted windows and thought, “I wish my car looked like that”? The good news is that DIY window tint kits have made it possible for anyone to achieve that same polished look at a fraction of the cost. Whether you want UV protection, glare reduction, or simply a more private ride, tinting your own windows is a rewarding project.
But here is the truth. Tinting windows is not just about sticking a piece of film on glass. It requires the right tinting tools, a bit of patience, and a solid understanding of the process. A pre-cut tint kit makes things easier, but knowing how to use it properly is what separates a mediocre result from a truly professional finish. This guide walks you through every step, from picking out your window tint film to curing your final application.
By the time you finish reading, you will feel confident enough to grab your DIY window tint kit and get started. Let us dive into everything you need to know.
Key Takeaways
- Right Kit Matters: Choosing a quality DIY window tint kit with proper window tint percentage ensures clean, bubble-free results every time.
- Tools Make the Difference: Having the correct tinting tools like a heat gun, tint squeegee, and application fluid saves time and frustration.
- Prep Is Everything: Proper interior trim removal and surface cleaning are the most overlooked steps that determine installation success.
- Method Choice Matters: The wet application method is beginner-friendly and produces fewer errors than the dry approach.
- Patience Pays Off: Allowing proper curing time and avoiding premature rolling of windows prevents damage and bubbling.
- Know the Law: Always check your state’s legal tint limits before purchasing to avoid fines and failed inspections.
- Maintenance Extends Life: Simple care habits like using ammonia-free cleaners keep your privacy tint looking sharp for years.
📑 Table of Contents
What Are DIY Window Tint Kits?
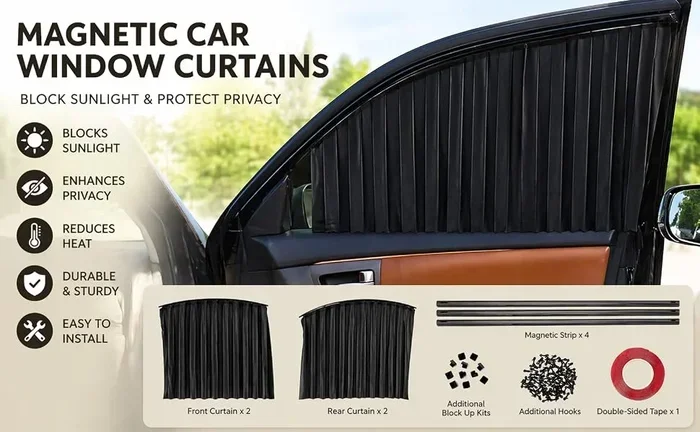
A DIY window tint kit is a collection of materials designed to help you tint your vehicle windows at home. These kits come in different sizes, styles, and price ranges, making them accessible for beginners and seasoned enthusiasts alike. The core component is always the window tint film, but a complete kit includes everything you need for a clean application.
What Is Inside a Typical Kit?
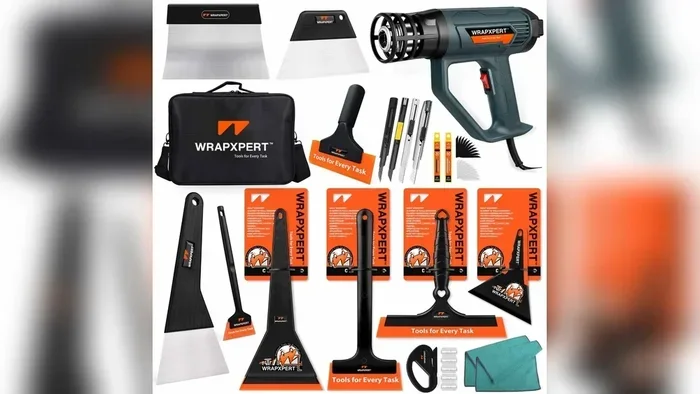
Most DIY window tint kits include the following items:
- Pre-cut tint film sized to fit your specific vehicle model
- Application fluid (also called tinting solution or slip solution)
- Tint squeegee for smoothing out bubbles and excess liquid
- Heat gun or hair dryer for shaping the film around curves
- Tint trimming tools like a utility knife or razor blade
- Microfiber cloths for cleaning the glass surface
- Application cards or scrapers for pressing the film into place
Some premium kits also include bonus items like tinting solution refills, bonus cutting tools, or detailed video tutorials. The quality of these components varies widely, which is why investing in a reputable brand pays off in the long run.
Why Choose DIY Over Professional Installation?
The cost savings alone are a huge reason. Professional car window tinting can cost anywhere from 200 to 800 dollars depending on your vehicle and the type of film you choose. A quality DIY window tint kit typically runs between 30 and 100 dollars. That is a massive difference.
Beyond cost, DIY tinting gives you full control over the process. You decide the window tint percentage, you choose the type of film, and you work at your own pace. Many car enthusiasts actually prefer the DIY route because it feels rewarding and gives them a deeper understanding of their vehicle.
Essential Tinting Tools You Will Need
Having the right tinting tools is just as important as choosing a good window tint film. Using the wrong tools can lead to scratches, bubbles, and an overall messy finish. Before you start any DIY window tint kit project, make sure your toolbox is fully stocked.
The Heat Gun
A heat gun is arguably the most important tool in your DIY window tint kits arsenal. It uses concentrated hot air to soften the tint adhesive, allowing you to shape the film around window curves and edges. Without a heat gun, getting a clean fit on curved rear windows is nearly impossible.
Many beginners wonder if a regular hair dryer works as a substitute. The answer is yes, for simple jobs. But a dedicated heat gun provides much stronger and more consistent heat, which makes a noticeable difference in your final result. Look for one with adjustable temperature settings to avoid overheating the film.
The Tint Squeegee
A tint squeegee helps you push excess application fluid out from under the film. It also removes air bubbles and ensures the window tint film sits flat against the glass. The best squeegees have a soft rubber edge that glides smoothly without scratching the tint.
Most DIY window tint kits include a basic squeegee, but upgrading to a professional-grade one can improve your results. A dual-sided squeegee with both a soft and firm edge gives you versatility for different stages of the application.
Application Fluid and Other Supplies
Application fluid is what allows you to position the film before it sticks. It creates a slippery layer that gives you time to adjust the placement. You can buy pre-made tinting solution or mix your own using a few drops of dish soap and water.
Other supplies you should have on hand include:
- Microfiber towels for streak-free cleaning
- Razor blade or utility knife for precise tint trimming
- Tar remover for cleaning sticky residue off window edges
- Glass cleaner that is ammonia-free
- Masking tape to protect surrounding trim and seals
How to Choose the Right Tint Kit
Not all DIY window tint kits are created equal. The right choice depends on your vehicle, your goals, and your budget. Understanding the different types of window tint film available will help you make an informed decision.
Types of Window Tint Film
There are several main categories of tint film to consider:
Dyed Tint Film: This is the most affordable option. It uses layers of dye to absorb solar heat and reduce glare. Dyed tint film offers decent glare reduction and privacy tint effects, but it tends to fade over time and offers less UV protection compared to higher-end options.
Metalized Tint Film: These films contain tiny metallic particles that reflect heat and add strength to the glass. Metalized tint provides excellent solar heat rejection and a shiny, mirror-like appearance. The downside is that it can interfere with cell phone signals and GPS reception.
Ceramic Tint Film: This is the premium choice. Ceramic tint uses nano-ceramic particles to block heat without affecting visibility or electronic signals. It offers the best UV protection, superior glare reduction, and does not fade over time. However, it comes at a higher price point.
Carbon Tint Film: A great middle-ground option. Carbon-based tint provides excellent heat rejection, a matte finish, and does not interfere with electronics. It is more durable than dyed film and offers better UV protection.
Understanding Window Tint Percentage
The window tint percentage refers to how much visible light the film allows to pass through. A lower percentage means a darker tint and more privacy. For example, a 5 percent tint is very dark and is often called a “limo tint,” while a 70 percent tint is nearly clear.
Here is a quick reference for common tint percentages:
- 5 to 20 percent: Very dark. Maximum privacy and heat rejection. Often used on rear windows.
- 25 to 35 percent: Moderate darkness. A popular choice for a balanced look and good UV protection.
- 50 percent: Light tint. Reduces glare without significantly darkening the glass.
- 70 percent and above: Nearly clear. Minimal tint effect, mainly for UV protection.
Before purchasing your DIY window tint kit, check your local legal tint limits. Every state has different regulations regarding how dark your tint can be and which windows it can be applied to. Ignoring these rules can result in fines and mandatory removal.
Step-by-Step Installation Process
Now that you have your DIY window tint kit and the right tools, it is time to install the tint. The wet application method is the most beginner-friendly approach and the one we recommend for your first project. It gives you room to reposition the film if needed, which reduces stress and mistakes.
Step One: Prepare Your Workspace
Find a clean, enclosed space with plenty of room to work. A garage is ideal because it keeps dust and debris out and gives you control over the temperature. Avoid tinting in direct sunlight, as the heat will cause the tint adhesive to stick too quickly and create bubbles.
Lay down a clean tarp or blanket on the floor to protect your vehicle and make cleanup easier. Gather all your tinting tools and application fluid within arm’s reach before you begin.
Step Two: Remove Interior Trim
Proper interior trim removal is one of the most important and most skipped steps in car window tinting. You need full access to the window edges and channels to ensure a clean fit. Use a trim removal tool or a flathead screwdriver wrapped in a cloth to gently pry off the plastic clips and panels.
Take your time with this step. Forcing clips can break them and lead to rattling noises later. Lay the trim pieces in a safe spot where you will not lose them.
Step Three: Clean the Glass Thoroughly
Use a microfiber towel and glass cleaner to wipe down the entire window surface. Any dust, dirt, or grease trapped under the film will show up as dark spots or bubbles. Pay special attention to the window channels and edges where grime tends to build up.
For stubborn residue, apply a small amount of tar remover to a cloth and gently wipe the affected area. Let the glass dry completely before moving to the next step.
Step Four: Cut and Position the Film
Take your pre-cut tint kit piece and hold it up to the window to check the fit. If it is a custom-fit kit, the edges should align closely with the window frame. If there is any overlap, use a razor blade or utility knife to trim the excess film for a precise fit.
Spray the window generously with application fluid. Then, peel the backing off the window tint film and spray the adhesive side as well. Carefully place the film onto the glass, starting from the top and working your way down. The fluid allows you to slide and adjust the position until it is perfect.
Step Five: Squeegee Out Excess Fluid
Once the film is positioned, use your tint squeegee to push the application fluid toward the edges. Start from the center and work outward in firm, even strokes. This is where you will catch most of the bubbles.
For curved areas like rear windows, use your heat gun to gently warm the film. This makes it pliable and allows it to conform to the curve without creasing or bubbling. Apply heat evenly and keep the gun moving to avoid overheating one spot.
Step Six: Trim the Edges
After the film is mostly adhered, use your razor blade to carefully trim the excess film along the edges. Run the blade along the window channel and the rubber seal for a clean finish. Be gentle to avoid scratching the glass or cutting into the film itself.
Step Seven: Allow Proper Curing Time
One of the biggest mistakes beginners make is rolling down their windows too soon. The tint adhesive needs time to cure fully. Most DIY window tint kits require at least three to five days of curing time, though some manufacturers recommend waiting up to a week.
During the curing period, keep your windows rolled up and avoid touching the film. You may notice some small water bubbles or a hazy appearance. This is completely normal and usually clears up as the film dries.
Quick Tips for a Flawless Installation
- Work on a cool, cloudy day if possible. Heat causes the film to stick too fast.
- Use plenty of application fluid. It gives you room to adjust.
- Clean the window edges thoroughly. Dirt causes the film to peel.
- Have a friend help with large windows like the rear windshield.
- Watch tutorial videos for your specific vehicle model before starting.
Common Mistakes to Avoid
Even with the best DIY window tint kit, mistakes can happen. The good news is that most of them are completely avoidable. Here are the most common errors beginners make and how to prevent them.
Skipping Surface Preparation
Dirty glass is the number one enemy of a clean tint job. If you rush the cleaning step, dust and debris will get trapped under the film and create permanent dark spots. Take the extra five minutes to clean thoroughly, and your results will speak for themselves.
Using Too Little or Too Much Application Fluid
Finding the right balance of application fluid takes practice. Too little fluid means you cannot reposition the film, leading to wrinkles and misalignment. Too much fluid can push the film out of position and create excess moisture that takes longer to dry out.
Ignoring Legal Tint Limits
Every state has specific legal tint limits regarding darkness and reflectivity. Applying a tint that is too dark on your front windshield or front side windows can result in a ticket and a requirement to remove it. Always research your local laws before choosing a window tint percentage.
Not Using Enough Heat on Curved Windows
Curved windows require more heat to shape the film properly. If you do not use your heat gun enough, the film will buckle, crease, or pull away from the edges. Apply heat gradually and keep the gun moving in a steady motion.
Rolling Windows Too Soon
We cannot stress this enough. Wait at least three to five days before rolling your windows down. The tint adhesive needs time to bond fully with the glass. Disturbing the film too early can cause peeling, cracking, or misalignment.
Maintaining Your Window Tint
Once your DIY window tint kit is installed and fully cured, proper maintenance will keep it looking great for years. The good news is that tint maintenance is simple and requires only a few adjustments to your regular car cleaning routine.
Cleaning Dos and Donts
Always use an ammonia-free glass cleaner on tinted windows. Ammonia breaks down the tint adhesive over time and can cause the film to bubble or peel. Instead, opt for a dedicated tint-safe cleaner or a simple mixture of water and a few drops of dish soap.
Use soft microfiber cloths or sponges when cleaning. Rough materials can scratch the tint surface and degrade its appearance over time. Avoid using high-pressure washers directly on the tinted windows, as the force can push water under the edges of the film.
Protecting Your Tint from Damage
Your window tint film is designed to last five to ten years with proper care. To maximize its lifespan, avoid parking in direct sunlight for extended periods when possible. While the tint itself blocks UV protection, extreme heat can still affect the adhesive over time.
If you notice small bubbles forming after the curing period, do not panic. Most small bubbles will disappear on their own as the film continues to cure. For persistent bubbles, you can use a heat gun on a low setting and gently press the bubble flat with a soft cloth.
When to Consider a Touch-Up or Replacement
Over time, you may notice peeling at the edges or discoloration of the window tint film. This is a sign that the tint has reached the end of its lifespan. At that point, you can either apply a new layer of tint adhesive to the affected area or replace the entire film using the same wet application method described earlier.
Conclusion
Installing DIY window tint kits is one of the most satisfying and cost-effective upgrades you can make to your vehicle. With the right tinting tools, a quality window tint film, and a little patience, you can achieve results that rival professional installations. The wet application method gives beginners the flexibility to learn and improve with each project, and the UV protection and glare reduction benefits make it well worth the effort.
Remember to take your time with each step. Proper interior trim removal, thorough glass cleaning, and generous use of application fluid are the foundations of a flawless finish. Respect the curing time, follow your local legal tint limits, and maintain your tint with gentle cleaning practices.
Now that you have all the knowledge you need, grab your DIY window tint kit and give it a try. Your car and your wallet will thank you. Happy tinting.
Frequently Asked Questions
Can I tint my windows myself as a complete beginner?
Absolutely. DIY window tint kits are designed with beginners in mind. The wet application method is forgiving and gives you room to adjust the film before it sets. As long as you follow the steps carefully and take your time, you can achieve professional-looking results on your first attempt.
How long does it take to tint all the windows of a car?
A full DIY window tint kit installation typically takes between two and four hours, depending on your vehicle size and experience level. Your first project might take longer as you learn the process, but subsequent jobs become much faster with practice.
Is DIY window tinting cheaper than professional installation?
Yes, significantly cheaper. A quality DIY window tint kit costs between 30 and 100 dollars, while professional car window tinting can range from 200 to 800 dollars. The savings are substantial, and the satisfaction of doing it yourself adds extra value.
What is the best window tint percentage for daily driving?
A window tint percentage of 35 percent is a popular choice for daily driving. It provides good glare reduction and UV protection without making the interior too dark. Always check your state’s legal tint limits before choosing a darkness level.
How long should I wait before rolling down my windows after tinting?
Wait at least three to five days before rolling your windows down. The tint adhesive needs adequate curing time to bond properly with the glass. Rolling windows too early can cause the film to peel, crack, or shift out of position.
Can I remove old tint and reuse the same window for a new film?
Yes, you can remove old window tint film and apply new tint to the same window. Use a heat gun to soften the old adhesive, peel the film off carefully, and clean the glass thoroughly with tar remover before applying the new DIY window tint kit. The surface must be completely clean for the best results.