How Long to Reset the Check Engine Light After an Oil Change
How long to reset the check engine light after an oil change? Typically, it takes just a few minutes if you use an OBD-II scanner or disconnect the battery. However, the light may return if the underlying issue isn’t fixed first. This guide walks you through every method, timeline, and tip so you can handle the check engine light confidently after your next oil change.
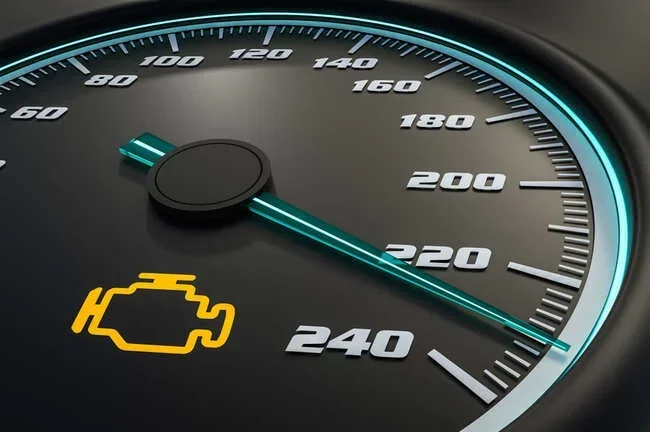
You just got your oil changed, and right there on the dashboard, the dreaded check engine light pops on. It is frustrating, confusing, and honestly a little scary. You wonder, “Did the mechanic do something wrong?” or “Is my car broken?”
Here is the good news. In most cases, resetting the check engine light after an oil change is quick, easy, and something you can do yourself. The whole process usually takes anywhere from five minutes to half an hour, depending on the method you use.
This article breaks down everything you need to know. We will cover the exact timelines, the best tools, common mistakes, and expert tips to make the process smooth. Whether you are a DIY car owner or someone who prefers a little guidance, you will find exactly what you need here.
Key Takeaways
- Reset Time: Most resets take between 5 and 30 minutes depending on the method you choose.
- Multiple Methods Exist: You can use an OBD-II scanner, disconnect the battery, or visit a parts store for help.
- Fix First, Reset Second: Always address the root cause before resetting the light, or it will come right back.
- Drive Cycle Matters: Some vehicles need a specific drive cycle after a reset to clear the code fully.
- Professional Help Is Optional: You can handle most resets yourself, but a mechanic can help if codes persist.
- Loose Gas Cap Is a Common Culprit: A loose or damaged gas cap often triggers the check engine light after an oil change.
📑 Table of Contents
- Why Does the Check Engine Light Come On After an Oil Change?
- How Long Does It Take to Reset the Check Engine Light?
- Tools You Need to Reset the Check Engine Light
- Common Mistakes People Make When Resetting the Light
- When Should You See a Professional?
- Preventing the Check Engine Light After Future Oil Changes
- How the Reset Process Works Under the Hood
- Comparison of Reset Methods
- What to Do if the Light Comes Back After Resetting
- Final Thoughts
Why Does the Check Engine Light Come On After an Oil Change?
Before we talk about timing, let us understand why the light shows up in the first place. Knowing the cause helps you fix the problem correctly the first time.
Common Reasons the Light Appears
Several things can trigger the check engine light during or right after an oil change. Here are the most common ones:
- Loose Gas Cap: This is the number one culprit. If the gas cap is not tightened properly after the service, your car’s fuel system loses pressure. The sensors detect this and throw a code that lights up your dashboard.
- Faulty Oil Cap Seal: Similar to the gas cap, the oil cap has a small seal. If it is worn or not seated correctly, it can trigger a diagnostic trouble code.
- Disconnected Sensor: During an oil change, a mechanic might accidentally bump or disconnect a sensor near the engine bay. This sends a false signal to the ECU.
- Existing Code Not Cleared: Sometimes the check engine light was already on before the oil change. The mechanic did not clear the old engine management light or diagnostic trouble code.
- Low Oil Level: If the oil was not filled to the correct level, the oil pressure sensor may trigger a warning. This sometimes shows up as a check engine light rather than an oil-specific warning.
Understanding these causes helps you decide whether a simple reset is enough or if you need to address a deeper issue first.
How Long Does It Take to Reset the Check Engine Light?
The short answer is: it depends on the method. Most resets take between five and thirty minutes. Let us look at each method and its exact timeline.
Method 1: Using an OBD-II Scanner (5 to 10 Minutes)
This is the fastest and most reliable way to reset the check engine light after an oil change. An OBD-II scanner plugs directly into your car’s diagnostic port and reads the stored codes.
Here is how it works:
- Locate your OBD-II port. It is usually under the dashboard on the driver’s side.
- Plug in the scanner and turn the ignition to the “on” position (do not start the engine).
- Wait for the scanner to connect. This takes about 10 to 15 seconds.
- Read the codes. The scanner will display any stored diagnostic trouble codes.
- Select “Clear Codes” or “Reset” on the scanner menu.
- Turn the ignition off, wait 30 seconds, then turn it back on.
Total time: about 5 to 10 minutes. The light should go off immediately if the issue was minor, like a loose gas cap.
Method 2: Disconnecting the Battery (15 to 30 Minutes)
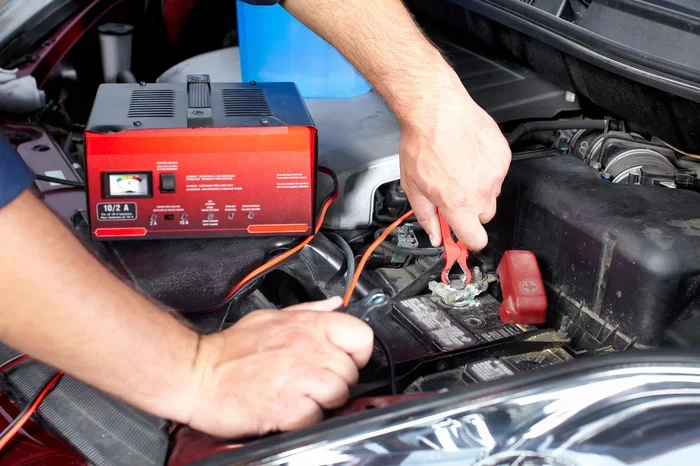
If you do not have an OBD-II scanner, you can reset the light by disconnecting the car battery. This method clears all stored codes and resets the ECU. However, it also resets other settings like your radio presets and clock.
Here is the step-by-step process:
- Turn off the engine and all electronics.
- Open the hood and locate the battery.
- Using a wrench, loosen the negative (black) terminal first.
- Disconnect the cable and let it sit for at least 15 minutes.
- Reconnect the negative terminal and tighten it securely.
- Start the engine and check if the check engine light is off.
The waiting period is what adds time here. Fifteen minutes is the minimum, but some cars need up to 30 minutes for the ECU to fully reset. This method works well but is not the most convenient if you are in a hurry.
Method 3: Visit a Parts Store (10 to 20 Minutes)
Many auto parts stores, including places where you can get an Autozone check engine light reading, offer free diagnostic scanning. They will plug in their scanner, read the codes, and often clear them for you at no charge.
This method is great if you do not want to buy a scanner or deal with the battery disconnect. Just drive to the store, wait in line, and let the professionals handle it. The whole visit usually takes 10 to 20 minutes from start to finish.
Method 4: Drive Cycle Reset (24 to 48 Hours)
Some vehicles require a specific drive cycle to clear the check engine light naturally after the problem is fixed. A drive cycle involves driving at specific speeds and temperatures to allow the ECU to relearn sensor values.
This method takes the longest. You may need to drive for 24 to 48 hours before the light turns off on its own. It is not the most practical option, but it works for cars that do not respond well to manual resets.
Tools You Need to Reset the Check Engine Light
Having the right tools makes the process much smoother. Here is what you will need for each method:
OBD-II Scanner Options
You do not need an expensive scanner. There are great options at every price point:
- Basic Code Readers ($20 to $40): These read and clear codes. They are simple to use and perfect for most homeowners.
- Bluetooth OBD-II Adapters ($15 to $30): These pair with your smartphone. You download an app, connect the adapter, and read codes wirelessly.
- Advanced Scanners ($50 to $200): These offer live data streaming, freeze frame data, and manufacturer-specific codes. They are ideal for frequent DIYers.
If you want to clear the check engine light yourself without buying anything, visiting a parts store is your best bet. Many stores let you borrow their scanner for free.
Other Useful Tools
- Wrench set: For disconnecting the battery terminal.
- Gas cap: A replacement gas cap costs about $10 and fixes many check engine light issues.
- OBD-II code reference guide: Helps you understand what each code means before clearing it.
Common Mistakes People Make When Resetting the Light
Avoiding mistakes saves you time and prevents the light from coming back. Here are the most common errors people make:
Resetting Without Fixing the Root Cause
This is the biggest mistake. If the check engine light came on because of a real problem, resetting it without fixing the issue just masks the symptom. The light will return within a few drive cycles. Always read the codes first and address the actual problem.
Disconnecting the Wrong Battery Terminal
Always disconnect the negative (black) terminal first. Disconnecting the positive terminal can cause electrical shorts and damage sensitive electronics in your car. If you are unsure, refer to your vehicle’s owner manual.
Not Tightening the Gas Cap
After an oil change, many people forget to check the gas cap. A loose gas cap is the leading cause of the check engine light after routine maintenance. Make sure you hear three clicks when you tighten it.
Clearing Codes Without Reading Them First
Jumping straight to “Clear Codes” without reading the codes first means you lose valuable diagnostic information. Write down or photograph the codes before clearing them. This helps you track recurring issues and share information with your mechanic.
Ignoring the Drive Cycle
After a reset, some cars need a full drive cycle to confirm the fix. If you reset the light and immediately turn off the car, the ECU may not register the repair. Drive normally for at least 20 to 30 minutes after a reset.
When Should You See a Professional?
Most check engine light resets after an oil change are simple and safe to handle yourself. However, there are situations where professional help is the right move.
You should see a mechanic if:
- The check engine light returns immediately after you reset it.
- You see flashing lights on the dashboard instead of a steady glow. A flashing light usually indicates a serious engine problem.
- The scanner shows codes related to emissions, fuel system, or engine internals.
- You notice other symptoms like rough idling, reduced power, or unusual noises.
- You are uncomfortable working under the hood or with electrical components.
Sometimes the issue goes deeper than a simple reset. For example, if a sensor was damaged during the oil change process, you will need a professional to diagnose and replace it. Do not hesitate to seek help when needed.
Preventing the Check Engine Light After Future Oil Changes
Prevention is always better than cure. Here are simple steps to keep the check engine light off after your next oil change:
- Double-check the gas cap: Before leaving the service center, make sure the gas cap is tight.
- Ask the technician to clear codes: Request that the mechanic clears any stored codes after the service.
- Inspect the oil cap: Ensure the oil cap is seated properly after the oil change.
- Keep a basic scanner at home: Having a small OBD-II scanner in your glove box gives you the power to handle minor issues on the spot.
- Follow the recommended oil change interval: Skipping or delaying oil changes can cause engine stress and trigger warning lights.
These small habits go a long way in keeping your car running smoothly and your dashboard warning-free.
How the Reset Process Works Under the Hood
Understanding what happens inside your car during a reset helps you appreciate the process. Here is a simple breakdown:
Your car’s ECU (Engine Control Unit) constantly monitors sensors throughout the engine. When a sensor detects something outside the normal range, the ECU stores a diagnostic trouble code and illuminates the check engine light. This is essentially your car’s way of saying, “Hey, something needs attention.”
When you reset the light, you are telling the ECU to clear those stored codes and start fresh. The ECU then begins a new monitoring cycle. If the original issue is resolved, no new codes are stored, and the light stays off.
If the issue is not resolved, the ECU will detect it again during the next monitoring cycle and turn the light back on. This is why fixing the root cause before resetting is so important.
For more information on clearing engine management lights and understanding the reset process, you can explore our guide on how to clear the engine management light.
Comparison of Reset Methods
| Method | Time Required | Difficulty Level | Cost | Best For |
|---|---|---|---|---|
| OBD-II Scanner | 5 to 10 minutes | Easy | $20 to $200 (one-time) | Quick, reliable DIY resets |
| Battery Disconnect | 15 to 30 minutes | Moderate | Free | When no scanner is available |
| Parts Store Visit | 10 to 20 minutes | Very Easy | Free | No tools needed |
| Drive Cycle | 24 to 48 hours | Hard | Free | Persistent minor codes |
As you can see, the OBD-II scanner method is the fastest and most convenient for most people. It gives you control and saves money over time.
What to Do if the Light Comes Back After Resetting
Sometimes the check engine light returns shortly after you reset it. This is normal and usually means the underlying issue was not fully resolved. Here is what to do:
- Do not panic. The light coming back is actually helpful. It tells you the problem is real and needs attention.
- Read the codes again. Use your scanner to check if the same code or a new code appeared.
- Address the issue. If it is a loose gas cap, tighten it. If it is a sensor problem, you may need a replacement.
- Reset again after fixing. Once the problem is resolved, clear the codes again and drive for a full cycle.
If the light keeps returning despite your best efforts, it is time to visit a trusted mechanic. Persistent codes often point to issues that need professional diagnostic equipment to resolve.
Final Thoughts
Resetting the check engine light after an oil change is one of those simple car maintenance tasks that anyone can handle. In most cases, it takes just five to thirty minutes depending on the method you choose. The OBD-II scanner approach is the fastest and most reliable, while the battery disconnect method works well if you do not have a scanner handy.
Remember to always fix the root cause before resetting. A loose gas cap or a disconnected sensor can trigger the light, and addressing these issues first prevents the light from coming back. Keep a basic scanner in your car, stay on top of your oil change interval, and your dashboard will stay quiet.
With the tips and steps in this guide, you now have everything you need to handle the check engine light confidently. Take action today, and keep your car running at its best.
Frequently Asked Questions
Can I drive my car with the check engine light on after an oil change?
In most cases, yes. If the light came on due to a loose gas cap or a minor sensor glitch, it is generally safe to drive. However, if the light is flashing or you notice other symptoms like rough idling or loss of power, pull over and seek help immediately.
Will resetting the check engine light erase my car’s stored codes permanently?
No. If the underlying issue is not fixed, the ECU will detect the problem again during the next monitoring cycle and store the code again. The light will return. Always fix the root cause before clearing codes.
How do I know if the check engine light is related to the oil change?
Use an OBD-II scanner to read the codes. Codes related to the gas cap, oil pressure, or sensor disconnect are often linked to the oil change process. If you are unsure, a quick visit to any store that offers an Autozone check engine light reading can help clarify things.
Do I need to reset the check engine light after every oil change?
No. You only need to reset it if the light is on. Routine oil changes do not automatically trigger the check engine light. If the light was already on before the oil change, ask the technician to clear it as part of the service.
Can a dirty oil filter cause the check engine light to come on?
Yes. A clogged or improperly installed oil filter can reduce oil flow and trigger the oil pressure sensor. This sometimes shows up as a check engine light rather than a dedicated oil warning. Always ensure your oil filter is the correct part and installed properly.
How long should I wait before resetting the check engine light after fixing the issue?
You can reset it immediately after fixing the problem. However, it is a good practice to drive for at least 20 to 30 minutes after the reset. This allows the ECU to complete a full monitoring cycle and confirm that the fix was successful.