H4 LED Headlight for Car The Ultimate Upgrade Guide
Upgrading to an H4 LED headlight for car use is one of the smartest moves you can make for safer night driving. This guide covers everything from brightness gains and energy savings to step by step installation tips. You will learn how to pick the right H4 LED kit, avoid common mistakes, and get professional results at home.
Switching your headlights is one of the easiest ways to improve your car. If you still drive with old halogen bulbs, you are missing out on a huge leap in visibility and safety. The H4 LED headlight for car upgrade has become the go to choice for drivers who want brighter, more efficient lighting on the road.
Halogen headlights have been standard for decades. They work, but they are dim, hot, and waste a lot of energy. LED technology has changed the game completely. An H4 LED conversion kit gives you crisp white light that makes dark roads feel like daylight. In this guide, we will walk you through everything you need to know about upgrading to H4 LED headlights.
Whether you are a DIY enthusiast or a first time installer, this article has you covered. We will look at the benefits, the buying guide, the installation process, and the mistakes to avoid. By the end, you will feel confident picking the best LED headlight bulb for your ride.
Key Takeaways
- Massive Brightness Boost: H4 LED headlights deliver far more lumens than halogen bulbs, making night driving much safer and more comfortable.
- Energy Efficient: LED bulbs use less power and produce less heat than traditional halogen options, saving fuel and reducing strain on your electrical system.
- Plug and Play: Most modern H4 LED conversion kits are designed for easy installation without cutting wires or modifying your vehicle.
- Beam Pattern Matters: Choosing the right beam pattern prevents blinding oncoming drivers and ensures proper road illumination.
- CANBUS Compatibility: Always check for CANBUS error-free kits to avoid dashboard warning lights after installation.
- Heat Management Is Key: Good cooling systems extend LED lifespan and maintain consistent light output over time.
- Right Kit for Your Vehicle: Not all H4 LED kits fit every car, so always verify compatibility before buying.
📑 Table of Contents
- What Is an H4 LED Headlight?
- Benefits of Upgrading to H4 LED Headlights
- How to Choose the Right H4 LED Headlight Kit
- Installation Guide for H4 LED Headlights
- Common Mistakes to Avoid
- Top H4 LED Headlight Brands Worth Considering
- Quick Tips for Getting the Most Out of Your H4 LED Headlights
- Conclusion
What Is an H4 LED Headlight?
The H4 bulb is one of the most common headlight designs in the world. It has been around since the 1970s and is used in millions of vehicles. Unlike single filament bulbs, the H4 design contains two filaments inside one bulb. This means it handles both your high beam and low beam functions.
Understanding the H4 Bulb Design
Here is how the H4 system works. One filament sits lower in the bulb and creates the low beam. The second filament sits higher and produces the high beam. When you flip the switch, the filament moves up or down inside the reflector. This simple design has kept the H4 standard in cars for over fifty years.
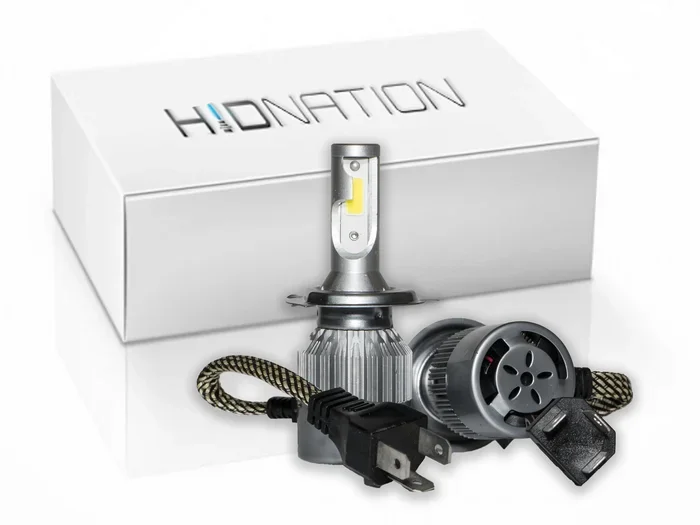
The H4 LED headlight for car setup replaces these old filaments with modern LED chips. The LED chips sit in a housing that mimics the original bulb shape. This makes installation simple because the new LED bulb drops right into your existing headlight housing. No rewiring. No modifications. Just a direct swap.
Why H4 LED Matters for Your Ride
You might wonder why H4 LED matters so much. The answer is simple. Your headlights are your first line of safety at night. Better light means you can see farther down the road. It also means other drivers can see your car more clearly. An H4 LED upgrade transforms your entire driving experience, especially on dark rural roads or poorly lit highways.
LED bulbs also run much cooler than halogens. They draw less power from your car’s electrical system. Over time, this adds up to real fuel savings and less stress on your wiring. The light output from a quality H4 LED kit is dramatically better than anything halogen can offer.
Benefits of Upgrading to H4 LED Headlights
The advantages of switching to an H4 LED headlight for car setup go far beyond just looking cool. Let us break down the real benefits you will notice every time you drive.
Brighter Night Driving
This is the number one reason people upgrade. A good LED headlight bulb produces anywhere from 3,000 to 6,000 lumens per pair. Compare that to a standard halogen bulb, which puts out around 1,000 lumens. The difference is night and day, literally. You will see potholes, animals, and obstacles much earlier.
Better road illumination also reduces eye strain on long drives. Your eyes do not have to work as hard to process dark roads. This means you arrive home less tired. It is a safety upgrade that pays for itself every single time you get behind the wheel at night.
Energy Efficiency and Longevity
LED bulbs use a fraction of the power that halogens do. A typical halogen H4 bulb draws about 55 watts per filament. An H4 LED conversion kit draws roughly 30 to 40 watts total. That is a big reduction in energy use, which helps your car’s fuel economy slightly over time.
Lifespan is where LEDs really shine. A quality LED headlight bulb can last 30,000 hours or more. Halogen bulbs typically last 450 to 1,000 hours. That means you might never have to replace your headlights again after a single LED upgrade. The long term savings on replacement bulbs alone are significant.
Instant On and Modern Look
Halogen bulbs take a second or two to reach full brightness. LEDs turn on instantly at full power. This matters when you quickly switch between high and low beams on the road. The response time is immediate.
The white light from LEDs also gives your car a modern, premium look. Many drivers notice their car looks better at night with crisp white LED lighting instead of the warm yellowish glow of halogens. It is a small detail that makes a big visual impact.
How to Choose the Right H4 LED Headlight Kit
Not all H4 LED kits are created equal. The market is full of options at every price point. Picking the right one can feel overwhelming, but it does not have to be. Here is what to look for when shopping for your H4 LED headlight for car upgrade.
Lumens and Brightness
Lumens measure the total light output of a bulb. More lumens means more brightness, right? Not exactly. You need the right balance. A bulb with 8,000 lumens might sound amazing, but if the beam pattern is poorly focused, all that light ends up blinding oncoming traffic.
Look for kits in the 3,000 to 5,000 lumen range per pair. This is the sweet spot for most vehicles. It gives you excellent visibility without crossing the line into dangerous glare. The goal is better night driving visibility, not just raw numbers.
Color Temperature and Beam Pattern
Color temperature is measured in Kelvin (K). For headlight use, 5,000K to 6,000K is the ideal range. This produces a clean white light that looks great and cuts through darkness effectively. Avoid anything above 6,500K because it starts to look blue and reduces actual visibility.
The beam pattern is just as important as brightness. A good LED kit should produce a sharp cutoff line. This prevents light from shining into the eyes of drivers coming toward you. Look for kits that include a projector lens or have a well designed reflector bowl for clean beam distribution.
CANBUS and Vehicle Compatibility
Modern cars use a system called CANBUS to monitor electrical components. When you swap in an LED bulb, the car might detect lower power draw and throw a warning light on your dashboard. This is called a CANBUS error.
To avoid this, always buy a CANBUS error free H4 LED kit. These kits include built in resistors or drivers that trick your car’s computer into thinking the LED bulb is drawing normal power. Check your vehicle’s compatibility list before purchasing. Most reputable brands list which cars their kits fit.
Heat Dissipation and Build Quality
LEDs produce heat at the back of the bulb where the chip sits. Good kits use aluminum heatsinks and quiet fans to pull that heat away. Poorly built kits overheat quickly and the light output drops over time.
Look for kits with a heat dissipation system that includes a finned aluminum body and a fan rated for long life. The waterproof rating matters too. An IP67 or IP68 rating means the bulb can handle rain, snow, and even car washes without any problems. Build quality directly affects how long your new headlights will last.
Installation Guide for H4 LED Headlights
One of the best things about an H4 LED headlight for car upgrade is how simple it is to install. Most people complete the job in under 30 minutes. No mechanic needed. Here is how to do it right.
Tools You Will Need
You do not need a lot of tools for this job. Here is a short list of what to have ready:
- Flathead screwdriver or trim removal tool
- Socket wrench set (usually 7mm, 8mm, or 10mm)
- Rubber gloves (to keep oils off the new LED bulb)
- Clean microfiber cloth
- Electrical tape (for securing wiring if needed)
That is it. The plug and play design of most H4 LED kits means you do not need to splice any wires or modify anything in your engine bay.
Step by Step Installation
Follow these steps for a smooth, error free install:
- Turn off your car and let the engine cool completely. Working on a hot engine can burn you.
- Open the hood and locate the back of the headlight assembly. You will see the rubber boot covering the bulb socket.
- Remove the rubber boot by twisting it counterclockwise or pulling it straight out, depending on your vehicle.
- Disconnect the old halogen bulb by pressing the retaining clip and pulling it straight out.
- Insert the new LED bulb into the socket. Make sure the base is fully seated. Do not touch the glass part of the LED with bare hands. Oils from your skin can create hot spots and shorten bulb life.
- Reconnect the wiring and secure the retaining clip.
- Put the rubber boot back on and twist or push it into place.
- Repeat on the other side for the second headlight.
- Turn on your car and test both high and low beams. Check the beam pattern on a wall or garage door to make sure it is properly aligned.
If the beam pattern looks off, you may need to adjust the aiming screws on the headlight housing. Most cars have vertical and horizontal adjustment screws at the back of the assembly. A quick adjustment takes just a few minutes.
Common Mistakes to Avoid
Even with a simple install like this, people make mistakes that cause problems. Here is what to watch out for when you upgrade your H4 LED headlight for car setup.
Ignoring Heat Management
Some buyers pick the cheapest LED kit they can find. These budget options often have tiny or no heatsinks at all. The LED chips overheat, and within a few months, the light output drops significantly. Always invest in a kit with proper heat dissipation. The extra cost is worth it for long term performance.
Choosing the Wrong Beam Pattern
Brightness alone does not make a good headlight. If the beam pattern is scattered or has no cutoff, you will blind other drivers. This is dangerous and in many places, illegal. Always choose an H4 LED kit with a well designed optics system that produces a clean, focused beam.
Skipping CANBUS Resistors
If your car is CANBUS equipped and you skip the error free setup, you will get dashboard warnings. These can range from a headlight warning light to more confusing error messages. Some people remove the warning by using coding or resistors, but it is much easier to just buy the right kit from the start.
Not Checking Housing Compatibility
LED bulbs work best in reflector housings designed for them. If your car has a very old or poorly designed headlight housing, the LED bulb might not perform as expected. Some vehicles work better with projector lens headlights. Before you buy, check whether your car has reflector or projector housings for the best results.
Top H4 LED Headlight Brands Worth Considering
The market has hundreds of H4 LED kits, but only a handful stand out for quality and performance. Here are some brands worth looking at, broken down by budget.
Budget Friendly Options
You do not need to spend a fortune to get a solid upgrade. Brands like BEAMTECH and Cougar Motor offer reliable H4 LED kits in the $30 to $50 range. These kits deliver good brightness, decent beam patterns, and basic CANBUS support. They are perfect for daily drivers where you want better visibility without a big investment.
Mid Range Picks
For around $50 to $100, kits from Auxito and MegaRacer offer excellent value. These brands include better heatsinks, quieter fans, and higher quality LED chips. The light output is noticeably better, and the build quality feels more premium. Many of these kits come with a warranty, which gives you peace of mind.
Premium Options
If you want the absolute best LED headlight bulb on the market, look at brands like Philips Ultinon and Osram Night Breaker LED. These kits cost $100 to $200 per pair, but the performance is outstanding. They feature advanced optics, superior color rendering, and industry leading lifespans. For drivers who spend a lot of time on dark roads, these premium kits are worth every penny.
| Brand | Price Range | Lumens (Pair) | CANBUS Ready | Best For |
|---|---|---|---|---|
| BEAMTECH | $30 – $50 | 4,500 | Yes | Budget daily drivers |
| Cougar Motor | $35 – $55 | 5,000 | Yes | Reliable mid range |
| Auxito | $50 – $90 | 6,000 | Yes | Best value overall |
| MegaRacer | $60 – $100 | 6,500 | Yes | High performance |
| Philips Ultinon | $100 – $200 | 5,500 | Yes | Premium quality |
| Osram Night Breaker LED | $120 – $220 | 5,000 | Yes | Long distance visibility |
Quick Tips for Getting the Most Out of Your H4 LED Headlights
Once your new H4 LED headlight for car setup is installed, a few simple tips will help you get the best results for years to come.
- Clean your headlights regularly. Dirt and grime on the lens reduce light output significantly. A quick wipe with a microfiber cloth makes a big difference.
- Check alignment every few months. Vibrations from driving can shift the aiming of your headlights over time. A quick check ensures your beam pattern stays sharp and safe.
- Use dielectric grease on connectors. This protects the electrical connections from moisture and corrosion. It is a small step that prevents big problems.
- Drive with low beams in town. Even with the best LED lighting, high beams in populated areas can blind other drivers. Use them responsibly on open roads only.
- Replace both bulbs at the same time. If one LED bulb burns out, the other is likely close to the end of its life too. Swapping both ensures even lighting on both sides of your car.
Conclusion
Upgrading to an H4 LED headlight for car is one of the most impactful changes you can make to your vehicle. The improvement in night driving visibility is immediate and dramatic. You will see more of the road, react faster to hazards, and feel more confident behind the wheel after dark.
The process is simple. Most kits are plug and play, and the installation takes less than an hour. With the right H4 LED conversion kit, you get brighter light, lower energy use, and a lifespan that will last for years. The key is choosing a quality kit with a good beam pattern, proper heat management, and CANBUS compatibility for your specific vehicle.
Do not settle for dim, yellowish halogen headlights another night. Make the switch to LED and experience the difference firsthand. Your eyes, your passengers, and everyone else on the road will thank you. Take the time to pick the right kit, follow the installation steps carefully, and enjoy the upgrade for many miles to come.
Frequently Asked Questions
Can I install an H4 LED headlight myself?
Yes, absolutely. Most H4 LED kits are plug and play and require no tools beyond a basic socket wrench. The entire process takes about 20 to 30 minutes per side. If you can change a light bulb at home, you can install an H4 LED headlight.
Will an H4 LED kit cause CANBUS errors on my car?
It depends on the kit you buy. Always choose a CANBUS error free H4 LED kit to avoid dashboard warning lights. These kits include built in resistors that match the power draw your car expects from a halogen bulb.
How bright should a good H4 LED headlight be?
Look for kits in the 3,000 to 6,000 lumen range per pair. This provides excellent road illumination without being so bright that it blinds oncoming drivers. Brightness is only good if the beam pattern is properly focused.
How long do H4 LED headlights last?
A quality LED headlight bulb can last 30,000 hours or more. That is roughly 20 years of normal driving. Halogen bulbs only last about 450 to 1,000 hours. The lifespan difference is one of the biggest advantages of LED technology.
Do H4 LED headlights work in all weather conditions?
Yes. Most quality H4 LED kits come with an IP67 or IP68 waterproof rating. They handle rain, snow, fog, and high pressure car washes without any issues. The heat dissipation system also ensures consistent performance in hot climates.
Can I use H4 LED headlights in a reflector housing?
Yes, H4 LED bulbs are designed to work in both reflector and projector housings. However, the beam pattern quality depends on the housing design. For the best results, choose an LED kit with a focused beam pattern that matches your vehicle’s headlight type.
=== CONCLUSION ===
The H4 LED headlight for car upgrade is a simple, affordable change that delivers big results. You get brighter light, better energy efficiency, and a modern look that transforms your night driving experience. Pick the right kit, install it carefully, and enjoy the road ahead with confidence.